Steve Tillman – Wildlife Trends
Imagine the following scenario. It’s a weekend day early last fall. The smell of damp leaves hangs in the cool morning air as you step from the truck to make your way to the field. Thoughts of a previous work week full of demands and deadlines retreat with each quiet stride down a well-worn trail. You’re finally back in the woods and headed out to check on last spring’s tree planting, one you hope will produce a bounty for wildlife in the seasons to come.
As you get closer, anticipation grows and the excitement of seeing the first season’s worth of growth quickens your step. Images of wildlife and your future habitat planting flood your mind as you walk along. Soon the planting site comes into view. Stepping into the clearing you hesitate, noticing something isn’t right. You had hoped to see a field full of healthy, growing fruit, nut and acorn trees. But most of the seedlings you and your helpers worked to plant are missing and the few that remain succumbed to drought or have been heavily browsed – a year’s worth of potential growth has been lost. Surveying the situation you realize that your only option is to replant the entire project next spring.
Does this story sound familiar? You may have experienced a similar scenario or know someone who has. Many seedlings planted into wild settings don’t survive to maturity due to impacts from wildlife, wind, and weed competition. Take heart, you’re not alone. Seedling failure is all too common, but it can be avoided. Read on to learn what you can do to assure your hardwood plantings survive, thrive and succeed…..the first time you plant!
5 Key Strategies to Grow Hardwood Trees and Shrubs for Wildlife
- Start with a plan – The adage “we don’t plan to fail but we often fail to plan” applies to the planting field too. Critical to a successful wildlife planting is a well-developed plan to guide your decision-making and action. Whether your aim is to establish permanent food plots, increase protective cover, protect riparian zones or grow trees and shrubs for other reasons to benefit wildlife, the best plantings start with a detailed plan. Take some time to collect information for the topics outlined below to guide your planting project. Doing so will better focus your resources and efforts to “Plant Like You mean It” and make sure your planting Survives, Thrives, and Succeeds!
- Planting Goals– Setting planting goals and objectives at the beginning of the planning process and well ahead of breaking ground will pay big dividends later. This process is critical to make sure your physical and financial resources are focused and better-prepares others to help, whether for hire or volunteer service. To get started, answer the following questions:
- Why am I planting?
- What do I want to accomplish?
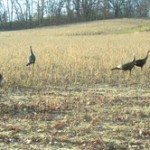
- For wildlife specifically – Plan for specific wildlife requirements to guide plant material selection, layout, and other land management strategies. Determine what wildlife species of interest live in your area and identify habitat requirements that your site has the potential to provide. At a minimum, focus your efforts on “the big three” that wildlife depend on; food, water and cover.
- For other uses and benefits – Identify additional project objectives beyond wildlife you may be interested in and develop strategies to achieve benefits associated with them. Examples include windbreak, soil retention, water quality, aesthetics, privacy, recreation, investment, legacy and other beneficial impacts your planting could yield.
- When do I want to see specific results? Write your expectations down and be specific and realistic.
- Short-term goals (1-3 years)
- Mid-term goals (3-5 years)
- Long-term goals 5-10 years and beyond
- Financial Resources – Success in the field isn’t free but neither is mediocre performance or outright failure from new plantings. It’s important, early on, to establish a budget that takes into account what makes sense for your bank account and for what’s practical in the field. It can cost significantly more to lose a new planting than to do things right the first time. A good strategy is to match the size and scope of your planting to only those trees and shrubs you can truly afford to see survive and grow. By doing so you can “plant less but grow more” meaning that by committing resources to fewer seedlings to improve their chances for survival this could yield more trees and shrubs that live to maturity than by planting more seedlings and leaving their fate to chance.
We’ve all heard horror stories of plantings that for one reason or another fell apart and had to be replanted. While guarantees are hard to come by, the following should be included in your planting budget to get the best results in the field:
- Site assessment – Here, we’re talking about a baseline inventory of your planting site. Information you need to know relates to geography and growing conditions which will help guide planting choices about what and where to plant.
- Site preparation – Depending upon the situation, a variety of steps may be required to prepare a site for planting. These can include trail construction and ongoing access to the planting site, invasive species removal, weed control, and resources needed to map and flag the site for individual seedling location.
- Plant material quality and quantity – Quality planting stock costs more but you’ve heard it before, “you get what you pay for.” Consider quality when choosing a nursery and budget only for the number of plants you can actually afford to protect and nurture through to full establishment. Planting without taking steps to assure survival and then hoping for the best can be a recipe for disappointment at best and the need to replant, at worst. “Plant Like You Mean It” means only planting what you intend to Survive, Thrive and Succeed.
- Plant growth and protection plan– Don’t just plant. Grow and protect your seedlings. Be sure to budget for seedling establishment “tools” to keep your newly planted stock from being killed or damaged by wildlife and otherimpacts at the beginning of the process. It is much more cost-effective to establish seedlings with tree growth and survival products from the start than to replant lost or damaged plants afterwards). Important growth and survival products to budget for include the following:
- Grow tubes for trees (sometimes called tree tubes or tree shelters) – Mini greenhouses to protect and grow individual nursery-grown seedlings, wild “volunteer” seedlings and direct seeded nuts or acorns. Be sure to choose the proper height of grow tube best suited to protect against browsing by critters. For example a 3ft grow tube can protect against rabbits and nutria but if deer are a problem, 5ft or 6ft grow tubes will be needed. Also, choose grow tubes that are best suited to available sunlight conditions for each seedling location. Go with a grow tube supplier that offers options for full sunlight conditions and for those sites that may have partial shade for part of the day (See Figure 1).
Special Note: It is important to remember that seedlings require a minimum of 6-8 hours of full sun during the growing season regardless of whether a full or partial sun grow tube is used. Do not use grow tubes with seedlings in shaded

understories as sufficient sunlight will not be available for survival and growth.
- Grow tube support and training stakes – Grow tubes require stakes for support while the trees are small and the best stake material, hands down, is fiberglass. Fiberglass stakes
flex in the wind which helps trees grow stronger, straighter stems from the start. Nurseries have long used fiberglass stakes to grow and train high value shade and ornamental trees and wild grown trees can benefit the same way. When choosing a fiberglass stake, make sure the material is UV resistant for many years and multiple uses. When reused, the cost per tree with fiberglass stakes can actually be less than wooden stakes (See Figure 2).
If a natural stake is required, white-oak heartwood or other decay resistant wood should be used. Avoid “mixed-hardwood” stakes or bamboo if the desired field is more than 1-2 years.
- Tree bark protection – To protect larger sapling trunks against antler rub and chewing rabbits and other rodents.
- Weed barrier – Stop weeds before they start and make sure your plants get all the sun, soil moisture and nutrients they need to compete.
- Fertilizer – Early nutrition doesn’t end at the nursery, it needs to continue in the field. Be sure to use encapsulated, time release fertilizers which can be used in the planting hole.
- Repellents – To use in conjunction with physical protection like grow tubes and tree bark protectors.
- Rodent control – Install gopher guards below ground and encourage natural rodent control by attracting owls, hawks, snakes and other rodent predators to your planting site.
- Planting site monitoring – Don’t forget to install basic precipitation monitoring equipment to help determine if supplemental watering is needed. Also consider installing trail cams
 to keep track of wildlife using your planting area and to keep track of human visitors including those unexpected.
- Planting equipment and labor – Even volunteers are not free. Budget for paid labor or for food and other amenities you wish to provide your volunteer planting crews.
- Planting aftercare follow-up – These include specific tasks to assure long-term success of your project and can include ongoing weed and invasive species control, supplemental watering, periodic site review to assess corrective measures if needed, and other maintenance necessary to keep your plantings growing strong.
- Professional fees – Property land surveys, tax advice, planting consulting fees and other professional services should be planned for early in the process. Doing so can avoid costly adjustments later and head-off potential problems you might not have considered.
- Conduct a planting site assessment – With a base plan and budget in progress it’s time to learn as much as possible about the planting site to make the best decisions about what to plant, where to plant it, and what needs to happen to grow it and protect it. Site geography, climate and growing conditions are part of a comprehensive analysis that includes the following topic areas:
- Seedling threat assessment – Knowing what can stand in the way of seedling survival and growth can go a long way towards choosing strategies to combat common threats both above and below ground. Of special note are the “Big-3” threats; Wildlife, Wind, and Weeds. Wildlife, from shoot-browsing deer to root-eating gophers, eat or kill far too many unprotected seedlings. Wind can desiccate new shoots and leaves and weeds rob young trees and shrubs of sunlight and moisture. Preparing for these and other threats will put your planting on the fast track.
- Biological assessment – Information about existing plant communities, local wildlife surveys and USDA plant zone hardiness ratings will help with decisions about what to grow, where to grow it and if special situations exist that offer unique opportunities for both plant and animal species of concern.
- Physical characteristics – Climate, soils, drainage and sunlight patterns matter. Understanding your site’s physical characteristics can impact everything from what to plant, where to plant, as well as where and how to construct permanent and semi-permanent access roads and trails if necessary.
- Boundary survey – Often assumed but not always verified, knowing your exact property boundaries can be critical to maintaining good neighbor relations. A little time and effort spent having your property surveyed (if it hasn’t
 been already) can pay off down the road to avoid potential disputes with adjacent landowners. Once verified, physically mark your property boundaries and if possible have them plotted on aerial photographs and topographic maps for reference in the field. Be sure to review this information with your help, especially with those operating heavy equipment of any kind.
- Structural factors – Consider limitations such as proximity to utilities (both above and below ground) and site access logistics such as stream crossings and trail conditions. Ongoing access to the site will be important for planting maintenance including transporting supplemental water to seedlings in the event of drought conditions. Seedlings often require water between rains and it’s important to plan for this requirement.
One additional structural factor to consider involves future land planning in your area. It is worth contacting your county planning office and other land management sources to learn if plans exist to develop or otherwise alter adjacent properties. Talk to your neighbors and others in the area to identify land use that may have an impact on your plans. Doing so may influence your decisions to choose specific plant materials to compliment or mitigate the potential impact on your property.
- Human Resources and Equipment Required – Determine if you will perform all or part of the planting or if you should hire help. If you’re not sure, answer the following questions:
- Do I have the knowledge and skill to oversee the project? If not, can I acquire them ahead of time?
- Do I have the time it takes to do the job right?
- Do I have the site preparation/planting tools and equipment that will be required? If not, can I afford to acquire or rent them?
- Do I have access to the manpower needed?
- Do I have resources to safely transport and temporarily store seedlings after receiving them from the nursery?
If the answer to one or more of the questions above is no, you may consider contracting services for some or all of your planting. But before hiring a contractor, research potential candidates including the following information:
- Experience – Does the contractor have the experience your planting requires? How long have they been involved in wildlife plantings like your project including site preparation, planting and aftercare?
- References – Does the contractor have references from other clients readily available for you to research? Do you have independent sources who have worked with the contractor that could provide reference information?
- Project Assurance – Will the contractor sign a consulting or project contract specifying prices for service and a guarantee for agreed upon results related to the work performed?
- Project Insurance – Does the contractor have adequate general liability and equipment (auto, field equipment, etc.) insurance?
- Cost-share potential – Some plantings may be eligible for cost-sharing and other landowner incentive programs offered through grants and government agencies. Incentives can apply to a range of plantings including riparian buffers, living snow and wind fences, bottomlands restoration, and species of special concern. If cost-sharing is of interest, contact your county conservation district or state district forestry office to learn more. If your property qualifies, cost-sharing can help stretch your planting dollar further.
- Record Keeping – Before breaking ground add photos and video to your field log or diary. Doing so will provide a visual “before” assessment to compare later, add to the legal record, and serve as a resource to guide future plantings. In addition, start a planting log or diary to record your activities. This information can provide invaluable reference information to measure performance and solve problems that may come up.
- Choose the best plant materials from the best sources
- Choosing a nursery – Research potential nurseries and select a supplier who can be of service before, during and after you plant. The best nursery is one that not only offers seedlings suited to your plan and site but which also stands behind its plant materials with a warranty, has a knowledgeable staff and offers specific recommendations for planting.
- Get additional help – Consult with land management professionals including wildlife biologists to develop specific strategies for your property. Wildlife conservation organizations are a good source of information and some like The National Wild Turkey Federation have biologists on staff to assist landowners with wildlife habitat planning.
- Plant selection criteria for wildlife should include:
- Food – Variety is the key to providing year-round nutrition. Select food producing trees and shrubs that bear food at different times of the year and consider species that hold a crop late into fall and early winter.
- Shelter and Cover – Choose plants that provide thermal cover for protection from the elements including roosting, bedding and loafing. Many trees and shrubs provide visual screening and concealment important for nesting and rearing while also serving as protective travel corridors.
- General guidelines
- Choose plant materials that are the best match to your region and site including soils, moisture and available sunlight.
- Determine type of planting stock best suited for your project (containerized VS. bare-root).
- Determine how many seedlings will be needed (also driven by your budget).
- Determine the best time of year to plant in your area – confirm with your nursery.
- Choose a blend of species to extend the range of benefits to support your goals.
- Lay out your planting to achieve optimal physical distribution as in the case of edge creation, successional plantings and forest openings. Plot this information on maps or aerial photos for reference by field crews and future record keeping. (See Figure 3).
- Ordering plant stock – Order as early as possible, even the year before actual planting if possible. Doing so will help make sure the species you want to plant are available when you want to plant.
- Plant Right and “Like You Mean It”
Phase I – Pre-Planting Site Preparation
Well before seedlings arrive, maybe even the year before planting, an important preparation step involves removing invasive species and other competing vegetation that can rob young seedlings of sunlight, soil nutrients and moisture. Depending upon your situation, a variety of weed control methods can be used including the use of mowing, disking, grazing, prescribed burning, and chemicals.
| Quick Tips: If prescribed burning is in the plan, confirm with your local jurisdiction specific requirements regarding permits and safety precautions. When it comes to using chemicals, always follow label instructions and review use in the context of your planting site especially as it relates to sensitive areas such as riparian zones. |
With weeds and other competing vegetation under control it’s time to lay out the planting pertaining to your plant material choices, site conditions, and property boundaries. A good strategy is to flag or otherwise mark the planting by location and species.
Next, finalize a seedling transport and handling plan which should include a timeline for the arrival of plant materials and proper temporary storage. Careless handling of seedlings prior to planting can result in significant mortality. Bare-root stock is particularly vulnerable to poor care and should be stored away from direct sunlight and kept cool and moist until planted. As little as five minutes on the tailgate of a truck in the hot sun can dry small root tips and kill a seedling. Don’t soak roots but do keep them moist in the packing material provided by your nursery. When in doubt, always consult with your nursery for their recommendations for best storage and handling. Acquire your plant growth and protection materials like grow tubes, support stakes, weed barrier fabric, and fertilizer ahead of time. Have these items ready to install at the time of planting will help avoid losing newly planted stock to critters and the elements.
Lastly, schedule planting help in advance to get your seedlings in the ground and protected at the same time. These preparations should include making sure all necessary planting gear is staged and ready to go and that refreshments and food are available for your crew.
Phase II –Planting Day Activities
Your seedlings, planting tools, and growth-survival materials are staged, ready to go. The planting crew is standing by and a field lunch is in the works. It’s time to plant, so let’s go over some general planting guidelines starting with the planting hole. Sometimes, in the rush to get trees in the ground, planters can skimp on the important step of digging a big enough planting hole.
 There’s an old rule of thumb that states “if you’ve got a five-dollar tree then you need a ten dollar planting hole”, meaning the hole needs to be at least twice as wide as the root area and deep enough to allow roots to extend their total length after planting. Hardwood stock, especially bare root seedlings with larger root systems, need more room to allow the roots to “fan-out” for the best transport of water and nutrients to the roots.
A larger planting hole will also help avoid root crowding and “j-rooting” that can kill seedlings. J-rooting can be caused by pushing roots into shallow or narrow wedge holes causing roots to angle back up in response to crowding. To avoid these and other problems, be sure to dig your planting hole big enough to allow roots to expand to their proper depth and width. This is a good time to add fertilizer packets with time released nutrients to the planting hole. Be careful to avoid pouring raw fertilizer into the planting hole as this could “burn” the roots. Instead, use encapsulated fertilizer that safely releases nutrients over time. Remember, the nursery provides safe and early nutrition for seedlings, so should you.
| Quick Tip: Dig planting holes BEFORE removing seedlings from protective bags, pouches or coolers. Keeping the seedlings properly stored until the exact time of planting will keep the roots moist and ready to grow. |
With a proper planting hole ready, place the seedling into the soil and if bare-root, untangle and spread the roots to maximize the area available. Avoid pruning the roots back. Instead make a bigger hole to accommodate them. The root tips are where most of the nutrient and water absorption occurs. You paid good money for those roots and they’re the engine that is going to drive early growth. Keep them and your seedlings will get a better start.
Next, keeping the seedling vertical, gently backfill the hole with soil making sure the seedling root collar (the slightly raised ring where the the roots and stem meet) is at ground level when finished. Pack the soil firmly leaving a slight rim of soil about 8-10 inches in diameter around the seedling to hold water.
Immediately after planting the seedling needs watering. It’s best to soak the root zone thoroughly, saturating the surrounding soil. Doing so assures adequate moisture during the initial acclimation phase. If subsequent rains are in short supply supplemental watering may be necessary. Many a planting has been lost to drought conditions that could have been mitigated with supplemental watering. Planting only those trees and shrubs you can afford to see survive and grow includes being able to provide additional water if Mother Nature doesn’t cooperate. If supplemental water is needed, knowing where to water is important. For seedlings in their first season, the roots are likely still concentrated in or near the planting hole, so watering close to the stem (6-12 inches) is best.
| Quick Tip: Avoid Overwatering. While it is important to keep your seedlings adequately watered during their first seasons, take care to avoid adding too much water. Roots require oxygen during the growing season so it’s important to avoid saturating the root zone to the point oxygen is depleted. A quick way to determine if young seedlings could use supplemental water is to simply take a screw driver or similar tool, choose a spot 8-12 inches from the seedling and dig down at least two inches. A good rule of thumb is to use your thumb (and fingers) to test. The soil should be damp or moist to the touch. If it is dry, it’s time to water. If it’s soaking wet, there’s no need to water at this time. When watering, be sure to check that water is draining into the soil and not running off into adjacent areas. Be sure to return few days later and check the soil moisture again. |
 Once seedlings are planted and watered, growth and survival products should be installed to assure survival and fast growth. Critters and wind kill countless seedlings before they ever get going. It’s commonplace in unprotected wild plantings for significant seedling losses of 50% or much higher in the first seasons. One of the best solutions ever devised to prevent mortality and promote healthy, balanced growth in hardwood seedlings is the grow tube (also called tree tube or tree shelter).
Properly designed grow tubes act like mini-green houses that create a micro-climate for healthy, balanced growth all while providing physical protection from drying winds and hungry critters. When deciding a grow tube be sure to choose a design that optimizes sunlight and provides venting in tube heights above 3ft. Optimal sunlight in a grow tube will encourage rapid but balanced growth and venting allows for faster CO2 replenishment during the growing season and helps promote proper dormancy prior to winter. Grow tubes protect young seedlings above ground, but don’t forget other products like weed barrier fabric to block competing weeds and gopher guards to protect the root zone (See Figures 4 and 5).
- Planting Follow-up
With the planting phase complete and seedling survival and growth measures in place, it’s time to prepare for follow-up in the field and in the office. For some, simply planting “green side up” and walking away to let chance and the elements dictate the fate of young seedlings is OK. For those who plant like they mean it this approach falls short of the mark. While planting with the bare minimum and walking away might work occasionally the odds are overwhelmingly against long term success. To assure your plantings benefit from the planning and work we’ve discussed so far, important after-care in the field and careful record keeping need to take place.
First let’s address field aftercare. This involves inspecting the site routinely during the first several growing seasons. Take time to physically inspect your seedlings and take photos or video for later reference. Update your field log or diary. What’s the condition of your planting including survival and growth? Are the grow tubes firmly in place and doing their job? Are the weeds under control? Are gophers killing some of the seedlings? Is supplemental water needed? Are insects causing damage? Is there a need for additional invasive species removal? What information did your trail cam images and weather monitoring equipment yield since your last visit? These and a host of other issues can be surveyed with regular field trips. In addition to providing necessary follow-up, having an excuse to be back in the field is generally a good thing.
Field inspections and ongoing aftercare are essential to good follow-up. Equally important is data collection and record keeping. “Nothing measured” often means “nothing managed.” Comparing what is seen to what can be measured determines progress towards your original goals. Collecting data on survival, growth, and site conditions can confirm that the planting is either on track or uncover potential needs for corrective measures. Keeping detailed field notes in a diary and accurate financial records in a ledger form will provide much needed reference information as your planting matures.
Conclusion:
It is common to hear mention of how many trees one person or a group of people have planted at one time or over a period of time. However, while the number of seedlings planted is often well known, the number of seedlings that survive to maturity is not. Measures of success need to include efforts to increase survival and growth for EVERY seedling planted because, in the end, the seedlings that survive and thrive are those that matter most.
Use the strategies discussed here to increase the success of your next hardwood planting; make a plan, conduct a detailed site assessment, choose the right plant materials from the right folks, “Plant Like You Mean it”, and follow-up. These strategies may require investing a little more up front but they can actually save you time, money, and frustration in the long run. Best wishes for your future planting!
For more articles on wildlife management topics such as food plot, tree planting, predator control, fertilizing and liming, soil tests, supplemental feeding, fish stocking, weed and grass control in timber and ponds, timber thinning, and many others visit Wildlife Trends. They offer bi-monthly issues from wildlife managers and biologists that help you take the guess work out of your land management.